Embarking on the journey of creating a compelling video presence often hinges on the final moments of your content. Understanding How to Create a Simple Outro and End Screen is paramount for transforming passive viewers into engaged subscribers and loyal audience members. This guide will navigate you through the essential strategies and practical steps to craft effective video endings that leave a lasting positive impression.
We will explore the fundamental purpose of these crucial video elements, delving into their psychological impact on audience retention and engagement. By dissecting common pitfalls and highlighting essential components, we aim to equip you with the knowledge to design visually appealing and action-oriented outros and end screens. This comprehensive approach ensures your videos not only capture attention but also guide viewers toward desired actions, fostering a stronger connection with your channel.
Understanding the Purpose of Outros and End Screens
The conclusion of your video is just as crucial as its beginning. A well-crafted outro and end screen serve as a vital bridge, connecting your viewer’s current engagement with future interactions. They are not merely an afterthought but a strategic tool designed to maximize viewer retention and foster a loyal audience.A thoughtful ending guides your audience on what to do next, preventing them from simply clicking away after the credits roll.
This strategic placement of calls to action, related content, and subscription prompts significantly influences the viewer’s journey on your channel, encouraging them to explore further and become a more engaged subscriber.
Viewer Retention and Engagement Enhancement
The fundamental role of video outros and end screens lies in their ability to keep viewers engaged with your content and channel for longer periods. By providing clear pathways to additional videos or ways to connect, you reduce the likelihood of immediate disengagement. This direct influence on viewer behavior is key to building watch time and channel growth.The psychological impact of a well-designed outro stems from several factors.
It provides a sense of closure while simultaneously offering new avenues for exploration, tapping into the viewer’s desire for more of what they enjoyed. This positive reinforcement encourages continued interaction.
Common Mistakes in Video Endings
Many creators overlook the importance of their video’s final moments, leading to missed opportunities for audience growth. These common errors can inadvertently lead to viewer drop-off rather than continued engagement.Here are some frequent mistakes creators make with their video endings:
- Abrupt or Non-existent Endings: Simply cutting off the video without any concluding remarks or visual elements can leave viewers feeling unsatisfied and unsure of what to do next.
- Overly Aggressive or Cluttered End Screens: While end screens are valuable, bombarding viewers with too many options or aggressive sales pitches can be overwhelming and off-putting.
- Lack of Clear Calls to Action: Viewers need to be explicitly told what you want them to do. Vague suggestions or no suggestions at all will result in inaction.
- Irrelevant or Outdated Suggestions: Recommending videos that are not logically connected to the current content or are no longer relevant to your channel’s focus can confuse viewers.
- Ignoring Mobile Viewers: End screens need to be designed with mobile usability in mind, as a significant portion of viewership occurs on mobile devices. Elements must be easily tappable.
Essential Elements of a Simple Outro
A well-crafted outro serves as a crucial bridge, connecting your audience to the next step in their engagement with your content. For a simple yet effective outro, focusing on a few core components ensures clarity and drives desired actions without overwhelming the viewer. These elements work together to provide a satisfying conclusion and guide your audience towards further interaction.The objective of a simple outro is to leave a lasting positive impression and encourage continued connection.
This is achieved by strategically placing key information and calls to action that are easy for viewers to understand and act upon. By streamlining these elements, you maximize the impact of your outro, making it a valuable tool for channel growth and audience retention.
Core Components of an Effective Simple Outro
An effective simple outro is built upon a foundation of clarity and purpose. By identifying and implementing a few key elements, you can create a powerful concluding segment that resonates with your audience and achieves your engagement goals. These components ensure that viewers know what to do next and feel motivated to do so.The essential components of a simple outro are:
- Branding: Consistent visual elements that reinforce your channel’s identity. This includes your channel logo, color scheme, and any recurring graphical motifs.
- Call to Action (CTA): Direct prompts that guide viewers to take a specific next step, such as subscribing, watching another video, or visiting a website.
- Social Proof/Engagement Prompts: Encouragement for viewers to interact further, such as liking the video, leaving a comment, or sharing the content.
- Next Steps/Related Content: Suggestions for what the viewer should watch or do next, such as links to playlists, related videos, or recommended content.
Visual Elements in a Simple Outro
Visuals play a significant role in making a simple outro memorable and engaging. While simplicity is key, strategic inclusion of visual elements can greatly enhance the viewer’s experience and guide their actions effectively. These elements should be clean, professional, and align with your overall channel aesthetic.A simple outro can incorporate a variety of visual elements to enhance its impact:
- Channel Logo: A prominent display of your channel’s logo helps with brand recognition and reinforces your identity. This can be static or subtly animated.
- Subscribe Button Animation: A visually appealing animation of a subscribe button can serve as a gentle reminder for viewers to subscribe.
- End Screen Elements: These are interactive video player elements that can include clickable thumbnails for other videos, playlists, a subscribe button, and links to external websites. They are typically placed towards the end of your video.
- Background Graphics: A clean, branded background or a subtle animation can add visual interest without being distracting. This could be a solid color, a gradient, or a low-opacity pattern.
- Social Media Icons: Small, recognizable icons linking to your social media profiles can be included if space allows and aligns with your CTA.
Importance of Clear Calls to Action
Clear calls to action (CTAs) are the driving force behind an effective outro. Without them, viewers may finish your video without knowing what you want them to do next, significantly reducing the potential for further engagement and growth. A well-defined CTA tells your audience precisely how to interact with your content or channel.The significance of clear CTAs in an outro cannot be overstated:
- Directing Viewer Behavior: CTAs explicitly tell viewers what action you want them to take, whether it’s subscribing to your channel, watching another video, or visiting a specific link.
- Increasing Engagement Metrics: By prompting actions like subscriptions, likes, and comments, CTAs directly contribute to improving key engagement metrics for your channel.
- Guiding Audience Journey: CTAs help to create a seamless flow for your audience, guiding them to discover more of your content or to connect with you on other platforms.
- Reinforcing Content Value: A CTA to watch another related video or a playlist suggests that you have more valuable content for them, encouraging them to stay on your channel.
A strong call to action can be as simple as:
“If you found this video helpful, please consider subscribing for more content like this!”
or
“Click on the video to your left to learn more about [topic].”
Designing a Basic End Screen Layout

Crafting an effective end screen involves more than just placing elements randomly. It requires a thoughtful design that guides viewers toward desired actions and enhances their overall viewing experience. A versatile layout ensures that your end screen remains functional and appealing regardless of the specific content you are promoting.The primary goal of an end screen layout is to create a clear and intuitive path for your audience.
This means strategically positioning interactive elements so they are easily discoverable and understandable, leading to increased engagement and channel growth.
Versatile End Screen Template Design
A successful end screen template is adaptable, allowing for the inclusion of various content types while maintaining a cohesive and professional look. This template should be designed with flexibility in mind to accommodate different video lengths, channel goals, and promotional needs.The core principle is to create distinct zones for different types of calls to action. This visual segmentation helps viewers quickly identify what each element is for.
- Central Focus Area: This is typically reserved for your most important call to action, often the subscribe button or a featured video. It should be prominent and easy to click.
- Secondary Content Slots: These areas are ideal for linking to other videos, playlists, or external websites. They should be clearly distinguishable from the primary focus.
- Branding Element: Incorporate your channel logo or a consistent branding visual to reinforce your identity.
Placement and Sizing of Interactive Elements
The strategic placement and appropriate sizing of interactive elements are crucial for maximizing their effectiveness. Elements that are too small can be difficult to click, especially on mobile devices, while those that are too large can overpower the screen and obscure other important content.Consider the natural reading and clicking patterns of users. Elements placed in the upper corners or the center tend to draw more attention.
- Subscribe Button: This should be a prominent and easily accessible element, often placed centrally or in a corner that naturally draws the eye. A common and effective placement is in the top-right or bottom-right corner, or centered. Its size should be substantial enough to be easily clickable without being overwhelming.
- Video Links (Thumbnails): These should be large enough to clearly display the thumbnail image and title but small enough to allow for multiple links to be displayed without clutter. A common approach is to have two to three video links arranged horizontally or in a grid. Ensure there is sufficient spacing between them.
- Playlist Links: Similar to video links, playlist links should be clearly distinguishable and appropriately sized.
- External Links (e.g., Website, Merchandise): These are often placed in a less prominent position than the subscribe button or featured videos, perhaps along the bottom or in a designated corner, to avoid distracting from core channel engagement.
“The size and placement of your call-to-action buttons directly impact their click-through rates. Aim for clarity and accessibility.”
Step-by-Step Guide for Arranging Elements
Creating an optimal end screen layout involves a systematic approach to ensure all elements are positioned effectively for maximum user engagement and clarity. This process focuses on building a balanced and intuitive design.Begin by defining the core purpose of your end screen for that specific video. Are you trying to drive subscriptions, encourage more watch time, or direct traffic to another platform?
Your primary goal will dictate the prominence of certain elements.
- Define Your Primary Call to Action: Decide which element you want viewers to interact with most. This will typically be your subscribe button or a specific video you want them to watch next.
- Allocate Space for the Primary Element: Place your subscribe button or featured video in a prominent position, such as the center or a top corner. Ensure it has enough visual weight to stand out.
- Arrange Secondary Content Links: Position links to other videos or playlists around the primary element. A common and effective arrangement is to place them to the left and right of the main focus, or in a row below. Aim for a balanced distribution.
- Incorporate Branding: Add your channel logo or a static branding image. This can be placed in a corner or subtly integrated into the background.
- Add External Links (if applicable): If you are linking to external websites or merchandise, place these in a less dominant area, such as the bottom corners, to avoid competing with your primary calls to action.
- Review for Clarity and Balance: Step back and look at the overall layout. Is it cluttered? Are the elements easy to distinguish? Is the flow intuitive? Make adjustments to spacing and sizing as needed.
For example, if you have three video links, ensure they are evenly spaced and their thumbnails are clearly visible.
- Test on Different Devices: It is highly recommended to preview your end screen on various screen sizes, particularly mobile, to ensure all elements are accessible and visually appealing across different viewing platforms.
Incorporating Branding into Your Outro
Your video outro is a powerful tool for reinforcing your brand identity. By strategically integrating your channel’s visual elements, you can create a memorable and cohesive viewing experience that encourages viewers to return. This section will guide you through the essential steps to make your branding shine.Seamlessly integrating your channel logo and brand colors is crucial for a professional and recognizable outro.
These elements act as visual anchors, reminding viewers who created the content they enjoyed. Consistency in these details across all your video endings builds a strong foundation for brand recognition.
Channel Logos and Brand Colors Integration
Your channel logo should be a prominent yet unobtrusive element within your outro. It serves as the primary identifier for your brand. Brand colors, when used consistently in backgrounds, text overlays, or graphic elements, create a distinct visual language that viewers will begin to associate with your content.When designing your outro, consider the following:
- Logo Placement: Position your logo in a consistent location on the screen for every video. Common placements include a corner (top-left, top-right, bottom-left, bottom-right) or centered. Ensure it doesn’t obscure any essential calls to action or other interactive elements.
- Logo Size: The logo should be large enough to be easily visible but not so large that it dominates the screen or distracts from other important information. A good rule of thumb is that it should be easily recognizable at a glance.
- Brand Color Palette: Utilize your established brand colors in the background of your outro screen, in text elements, and in any animated graphics. If your brand has a primary and secondary color, use them strategically to create visual interest and hierarchy.
- Color Contrast: Ensure sufficient contrast between your logo, text, and background colors for readability and accessibility.
Maintaining Brand Consistency Across Video Endings
Brand consistency is key to building a recognizable and trusted presence. This means that every time a viewer sees your outro, it should feel familiar and aligned with the overall impression of your channel. This consistency extends beyond just the visual elements and can also encompass the tone and messaging.Strategies for maintaining brand consistency include:
- Template Creation: Develop a master template for your outro that includes all your branding elements. This template can then be easily applied to all your videos, ensuring uniformity.
- Style Guide: If you have a formal brand style guide, refer to it for precise color codes, font usage, and logo variations. If not, create a simple internal guide for your own reference.
- Consistent Messaging: Beyond visuals, ensure the calls to action and any accompanying text in your outro are consistent in their tone and message, aligning with your channel’s overall voice.
- Regular Audits: Periodically review your past outros to ensure they still align with your current branding and that no inconsistencies have crept in.
Using a Consistent Outro Style to Build Brand Recognition
A consistent outro style transforms a simple end screen into a powerful branding tool. When viewers repeatedly encounter the same visual cues and style at the end of your videos, they begin to associate these elements with your content and your channel. This familiarity fosters a sense of loyalty and makes your content more memorable.Consider the following aspects of consistent outro style:
- Visual Theme: Develop a distinct visual theme for your outros that complements your channel’s overall aesthetic. This could involve specific animation styles, graphic elements, or background textures. For example, a tech channel might use sleek, futuristic animations, while a cooking channel might opt for warm, inviting graphics.
- Font Usage: Stick to your brand fonts for all text within the outro. Using the same fonts across all your videos reinforces your visual identity.
- Animation and Transitions: If you use animations or transitions in your outro, ensure they are consistent in their style and execution. A consistent animation style can become a recognizable signature of your brand.
- Call to Action Design: The design and placement of your calls to action (e.g., subscribe buttons, links to other videos) should also be consistent. This predictability helps viewers quickly understand what to do next.
By thoughtfully integrating these branding elements, your outro will evolve from a mere closing sequence into a valuable asset that strengthens your brand and keeps viewers engaged.
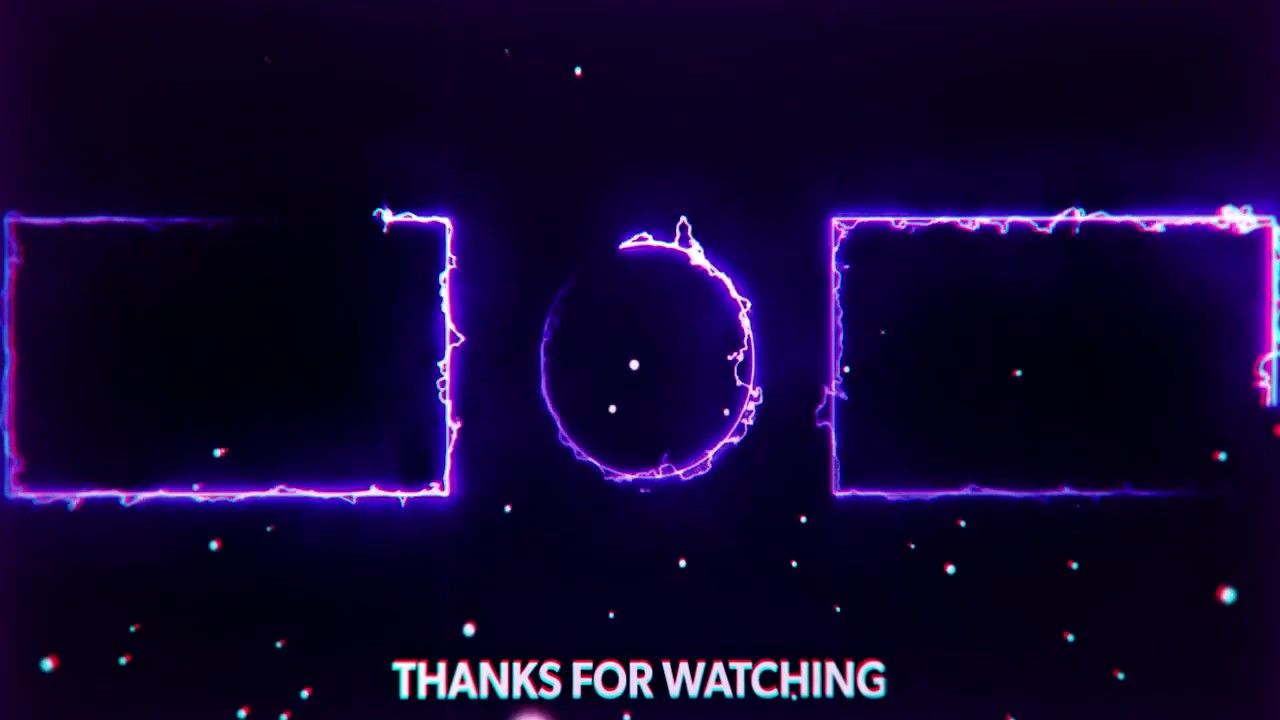
Creating Visuals for Your Outro

Visuals are the silent storytellers of your video’s conclusion. They are crucial for reinforcing your brand identity and guiding viewers towards their next interaction. Crafting compelling visuals for your outro doesn’t require advanced animation skills; simple, well-executed elements can be highly effective. This section will guide you through generating these visual components, from animated graphics to thoughtful sound design, all aimed at leaving a lasting, positive impression.The goal of your outro visuals is to be both informative and engaging.
They should clearly present your calls to action while maintaining the aesthetic and tone established throughout your video. By carefully considering each visual element, you can transform a static end screen into a dynamic and persuasive tool that encourages viewer loyalty and further engagement with your content.
Generating Simple Animated Graphics
Creating simple animated graphics for your video outro can significantly enhance its professional appeal and viewer retention. These animations can range from subtle transitions to more dynamic elements that draw attention to key information. The key is to keep them clean, purposeful, and consistent with your overall brand.One effective approach is to use motion graphics software or even built-in features within video editing platforms.
For instance, animating your logo to subtly fade in or out, or having text elements like “Subscribe” or “Watch Next” slide in smoothly, can add a polished touch. Consider using simple shape animations, like a pulsing circle around a subscribe button or a flowing line connecting different calls to action. These can be achieved with tools like Adobe After Effects, DaVinci Resolve’s Fusion page, or even simpler online tools that offer pre-set animation templates.
The focus should be on fluid movement that doesn’t distract from the message.Another technique involves using animated icons. For example, a small animated play button that subtly bounces next to a “Watch Next” suggestion, or a social media icon that animates with a gentle shimmer as it appears. These small touches can make the static elements of your end screen feel more alive and inviting.
When designing these animations, always consider the pacing; a quick, energetic animation for a subscribe button might be effective, while a slower, more deliberate animation might be better suited for directing viewers to a longer video.
Selecting Complementary Background Music and Sound Effects
The audio elements of your outro play a vital role in shaping the viewer’s emotional response and reinforcing the message you want to convey. The right music and sound effects can create a sense of closure, excitement, or anticipation, guiding the viewer towards their next action seamlessly. It’s about creating an auditory cue that signals the end of the current video and an invitation to engage further.When selecting background music for your outro, consider the overall tone of your video.
If your content is upbeat and energetic, a lively, instrumental track can maintain that momentum. For more reflective or educational content, a calm, ambient melody might be more appropriate. Many royalty-free music libraries offer tracks categorized by mood and genre, making it easier to find something that fits. The music should ideally fade in gently and then subtly underpin the visual elements without overpowering them.
A common practice is to use a track that has a clear beginning and end, or one that can be easily looped or faded out smoothly as the outro concludes.Sound effects can be used sparingly to highlight specific calls to action. For example, a subtle “ding” or “chime” when a new video suggestion appears, or a gentle “swoosh” as a subscribe button animates into view.
These auditory cues provide positive reinforcement and can make the interaction feel more rewarding. When choosing sound effects, ensure they are not jarring or repetitive. They should be subtle enough to complement the music and visuals, acting as a subtle nudge rather than an interruption. Think of them as the punctuation marks of your outro’s audio narrative.
Conveying Finality and Invitation Through Visual Cues
The visual design of your outro is paramount in signaling the end of the video while simultaneously encouraging viewers to take the next step. This balance between closure and invitation is achieved through a thoughtful arrangement of elements that communicate finality and direct the viewer’s attention effectively.A sense of finality is often conveyed through a clear visual structure that consolidates all the necessary information.
This can include a well-defined space for your logo, social media links, and calls to action. Elements that recede or fade out gradually can also imply completion. For instance, if your main video content fades to black, the outro screen appearing can be a distinct visual shift that marks the transition to the concluding segment.The invitation to engage is primarily communicated through clear and prominent calls to action.
Visual cues such as arrows pointing towards clickable elements, pulsating highlights around subscribe buttons, or “Watch Next” thumbnails that are visually distinct and inviting can guide the viewer. The use of contrasting colors for interactive elements can also draw the eye. For example, a bright, clickable button against a more muted background makes it immediately obvious what the viewer should interact with.
Furthermore, the placement of these elements is crucial; typically, placing subscribe buttons and suggested videos in easily accessible corners or prominent central areas ensures they are not missed. The overall layout should be clean and uncluttered, preventing viewer fatigue and making the desired actions intuitive.
Implementing Outros and End Screens in Video Editing Software
Integrating your thoughtfully designed outro and end screen elements into your video is the final, crucial step in the creation process. This involves utilizing the features within your video editing software and the specific tools provided by video hosting platforms. By mastering these implementation techniques, you ensure your viewers are guided effectively towards further engagement.This section will guide you through the practical application of adding static outro screens within common video editing software and detail the process of incorporating interactive end screen elements on popular video hosting platforms.
We will also provide a comparative overview of the basic features for implementing these elements across different editing environments.
Adding Static Outro Screens in Video Editing Software
Static outro screens, often a single image or a short video clip, are a fundamental component of video editing. Most video editing software provides straightforward methods for overlaying these elements at the end of your main video content. The key is to ensure the outro screen appears at the precise moment you intend and remains visible for the appropriate duration.Here’s a general approach to adding static outro screens in common video editing tools:
- Import Your Outro Asset: First, import your static outro image file (e.g., JPEG, PNG) or video outro clip into your video editing project’s media bin.
- Place on Timeline: Drag and drop the imported outro asset onto a video track above your main video content on the timeline. Position it so that it begins at the exact point where your main video concludes.
- Adjust Duration: Extend or trim the outro asset on the timeline to match the desired display time. A common duration is between 5 to 20 seconds, allowing viewers sufficient time to absorb the information.
- Layering and Transparency: If your outro screen has transparent elements (like a logo on a transparent background), ensure your editing software supports alpha channels to maintain this transparency when layered over your final video frame.
- Exporting: When you export your final video, the outro screen will be rendered as an integral part of the video file.
The precise placement and duration of your static outro are critical for maintaining a professional and engaging viewing experience.
Adding Clickable End Screen Elements in Video Hosting Platforms
While video editing software handles the visual integration of your outro, interactive end screen elements like clickable links to other videos, playlists, or subscription buttons are typically added directly within the video hosting platform itself. This functionality allows viewers to take immediate action without leaving the platform.The process for adding clickable end screen elements varies slightly between platforms, but the core concepts remain consistent.
Let’s look at YouTube, a widely used platform:
- Access YouTube Studio: Log in to your YouTube account and navigate to YouTube Studio.
- Select Your Video: Go to the ‘Content’ section and select the video for which you want to add an end screen.
- Open the Editor: Click on the ‘Editor’ option from the left-hand menu.
- Add End Screen Element: Within the editor, you will find an ‘End screen’ option. Click on it to begin adding elements.
- Choose Element Type: YouTube offers various element types:
- Video/Playlist: Link to another video or playlist on your channel. You can choose to feature a specific video, suggest the best for the viewer, or select a playlist.
- Subscribe Button: A direct call to action for viewers to subscribe to your channel.
- Channel: Link to another YouTube channel.
- Link: For channels that meet eligibility requirements, you can link to external websites (e.g., your own website, merchandise store).
- Position and Timing: You can drag and drop each element onto the video preview and adjust its appearance time. End screen elements typically appear in the last 5 to 20 seconds of your video.
- Save Changes: Once you have arranged all your desired elements, click ‘Save’.
Platforms like Vimeo also offer end screen or interactive element features, though the specific interface and options might differ. Always refer to the platform’s official documentation for the most up-to-date instructions.
Comparison of Basic Features for Implementing Outros Across Different Editing Software
Implementing static outro screens is a standard feature across most video editing software, from professional-grade applications to more accessible consumer-level tools. While the core functionality is similar, there can be differences in ease of use, advanced layering options, and integration with other project elements.Here’s a comparison of basic features for implementing static outros:
| Feature | Professional Software (e.g., Adobe Premiere Pro, Final Cut Pro) | Mid-Range Software (e.g., DaVinci Resolve, Filmora) | Basic/Consumer Software (e.g., iMovie, Windows Video Editor) |
|---|---|---|---|
| Timeline Layering | Robust multi-track layering for complex compositions. | Supports multiple video tracks, allowing for easy overlay. | Typically offers limited tracks, but sufficient for a simple outro overlay. |
| Asset Import | Supports a wide range of image and video formats, including high-resolution and alpha channel transparency. | Good support for common image and video formats; alpha channel support may vary. | Supports standard image and video formats; transparency might be less consistently handled. |
| Duration Control | Precise control over the exact start and end points of the outro asset. | Intuitive drag-and-drop resizing and trimming of assets. | Simple tools for adjusting the length of clips. |
| Keyframing/Animation | Advanced options for animating elements within the outro screen (e.g., fading in/out, subtle movements). | Some animation capabilities, allowing for basic transitions or movement. | Limited to basic transitions; advanced animation is generally not available. |
| Branding Integration | Seamless integration of logos, text, and other brand assets with high fidelity. | Good integration capabilities for maintaining brand consistency. | Can integrate basic branding elements effectively. |
Regardless of the software used, the principle of placing your outro asset on a track above your main video and adjusting its duration is universally applicable.
Best Practices for Simplicity and Clarity
Creating an effective outro and end screen is about guiding your viewers towards their next engagement point without overwhelming them. Simplicity and clarity are paramount to achieving this goal, ensuring your viewers can easily understand and interact with the elements you’ve provided. This section will delve into the core principles and practical tips for maintaining a clean and user-friendly design.The principle of “less is more” is fundamental when designing simple outros and end screens.
A cluttered screen can confuse viewers and lead to missed opportunities for engagement. By focusing on essential elements and removing any unnecessary distractions, you can create a more impactful and effective call to action.
Ensuring End Screen Elements are Easily Understood and Clickable
For your end screen elements to be effective, they must be intuitively understood and readily clickable across a range of devices. This involves thoughtful design and strategic placement.To ensure clarity and clickability, consider the following:
- Clear Visual Hierarchy: Arrange elements in a logical order of importance. The most critical calls to action, such as subscribing or watching another video, should be the most prominent.
- Adequate Spacing: Ensure sufficient white space between clickable elements. This prevents accidental clicks and makes the screen feel less cramped.
- Appropriate Sizing: End screen elements, especially buttons and links, should be large enough to be easily tapped or clicked on touchscreens and mice. For mobile devices, aim for a minimum tappable area of 48×48 CSS pixels.
- Concise Text: Use short, action-oriented text for labels. For example, “Subscribe” is more effective than “Click here to subscribe to our channel.”
- Distinct Icons: When using icons, ensure they are universally recognized (e.g., a play button for videos, a bell for notifications).
- Testing on Multiple Devices: Before finalizing your outro, preview and test it on various screen sizes and devices, including desktops, tablets, and smartphones, to identify any usability issues.
Ideal Duration for a Simple Outro
The duration of your outro is a critical factor in preventing viewer fatigue and maximizing engagement. A well-timed outro respects your audience’s attention span while still providing sufficient opportunity for interaction.The ideal duration for a simple outro is generally between 5 to 20 seconds. This range allows enough time for viewers to process the information and make a decision without feeling rushed or bored.
- Short and Sweet (5-10 seconds): This duration is effective for very straightforward calls to action, such as a single subscribe button and a link to one recommended video. It’s ideal for audiences with short attention spans or when the primary goal is to quickly direct them to another piece of content.
- Standard Engagement (10-20 seconds): This is the most common and effective range for most channels. It provides ample time to showcase multiple video recommendations, a subscribe button, and potentially links to social media or a website. This duration allows for a more comprehensive end screen experience.
- Avoid Prolonged Outros: Outros exceeding 20 seconds can lead to viewers clicking away before they have a chance to engage with the end screen elements. The novelty of an outro wears off quickly, and viewers often want to move on to the next piece of content.
It is important to note that the optimal duration can also depend on the complexity of your end screen and the overall pacing of your video content. Always consider your audience and the specific goals you aim to achieve with your outro.
Testing and Iterating on Your Outro Design

Once your simple outro and end screen are implemented, the journey doesn’t end. Continuous evaluation and refinement are key to maximizing their effectiveness and ensuring they serve their intended purpose of guiding viewers to further engagement. This involves actively seeking feedback and analyzing how your audience interacts with these elements.The process of testing and iteration allows you to move beyond assumptions and make data-driven decisions about your outro’s design and placement.
By understanding what resonates with your viewers, you can optimize calls to action, improve click-through rates, and ultimately foster a more connected and engaged community around your content.
Gathering Feedback on Outro Effectiveness
To understand how well your outro is performing, it’s essential to solicit direct and indirect feedback from your audience. This can be achieved through various channels, allowing for a comprehensive view of viewer perception and behavior.Methods for collecting feedback include:
- Direct Audience Surveys: Periodically embed short, focused surveys within your video descriptions or community posts. These surveys can ask specific questions about the clarity of your calls to action, the appeal of your end screen visuals, and whether viewers found it easy to navigate to other content. For example, a question might be: “On a scale of 1 to 5, how easy was it to find another video you wanted to watch after the outro?”
- Comment Section Analysis: Actively monitor the comments section of your videos. Look for recurring themes or direct mentions of your outro or end screen. Viewers might comment on specific elements they liked or disliked, or express confusion about where to click next.
- Social Media Polls: Utilize the polling features on platforms like YouTube Community tab, Twitter, or Instagram Stories to ask quick questions about your outro. These can be less formal but still provide valuable insights into general sentiment. An example poll could be: “Did you find our end screen helpful in discovering more content? Yes / No.”
- Usability Testing (Informal): Ask a small group of trusted friends, colleagues, or loyal subscribers to watch a video with your outro and observe their experience. Note any hesitations, confusion, or spontaneous actions they take.
Analyzing Viewer Behavior with End Screens
Beyond direct feedback, observing how viewers interact with your end screens provides crucial quantitative data. Analytics tools offer insights into click-through rates, watch time, and audience retention, which are direct indicators of your outro’s success.Key metrics to analyze include:
- Click-Through Rate (CTR) on End Screen Elements: This is the percentage of viewers who clicked on one of your end screen elements (e.g., subscribe button, video thumbnail, playlist link) out of the total number of viewers who saw the end screen. A low CTR on a specific element might indicate it’s not appealing or visible enough.
- Audience Retention Graphs: Pay close attention to the audience retention graph in your analytics. A sharp drop-off immediately after the outro begins can suggest that viewers are not finding the end screen engaging enough to continue watching. Conversely, a sustained or even increased engagement might indicate your outro is effectively directing viewers.
- Watch Time from End Screen Clicks: Track how much additional watch time is generated from viewers clicking on your end screen elements. This directly measures the effectiveness of your outro in driving further content consumption.
- Viewer Session Duration: Analyze the overall duration of viewer sessions. If viewers are leaving your channel immediately after the end of a video, your outro may not be successfully encouraging them to explore more content.
For instance, if your analytics show a high CTR on your “Next Video” suggestion but a low CTR on your subscribe button, it suggests viewers are interested in more content but less compelled to subscribe. This data can inform future design choices.
Strategies for Incremental Outro Improvements
Based on the feedback and data gathered, you can implement a series of small, targeted changes to continuously enhance your outro. The goal is to make iterative improvements rather than undertaking drastic redesigns, which can sometimes be disruptive.Strategies for ongoing refinement include:
- A/B Testing End Screen Elements: If your platform allows, test different versions of your end screen. For example, try placing your subscribe button on the left side versus the right, or test different thumbnail styles for suggested videos. Observe which variation yields better engagement.
- Varying Call-to-Action Prompts: Experiment with different wording or visual cues for your calls to action. Instead of a static “Subscribe,” try a more dynamic prompt like “Join our community!” or “Don’t miss out – Subscribe!”
- Optimizing Video Suggestions: Regularly review the videos suggested in your end screen. Ensure they are relevant to the current video and also represent a logical next step in a viewer’s journey through your content. Consider using YouTube’s “Suggested” feature which automatically picks the best video for each viewer.
- Adjusting Outro Timing and Duration: Experiment with the length of your outro. If viewers are consistently dropping off before the end, it might be too long. If engagement is low, it might be too short to effectively present options.
- Refreshing Visuals and Branding: Periodically update the visual elements of your outro to align with any changes in your channel’s branding or overall aesthetic. This keeps your outro feeling fresh and professional.
For example, if analysis reveals that viewers often miss the subscribe button, a simple iteration could involve making the subscribe button larger, using a more contrasting color, or adding a subtle animation to draw attention to it. These small adjustments, when based on data, can lead to significant improvements over time.
Conclusive Thoughts
")
In conclusion, mastering How to Create a Simple Outro and End Screen is a pivotal step in elevating your video content. By thoughtfully integrating essential elements, branding, and clear calls to action, you can significantly enhance viewer retention and encourage desired engagement. Remember, simplicity and clarity are key, and continuous testing and iteration will refine your approach, ensuring your video endings are both effective and memorable, ultimately contributing to your channel’s growth and success.