Embarking on the journey of video creation can feel daunting, but a well-crafted storyboard serves as your indispensable roadmap. This essential pre-production tool transforms abstract ideas into tangible visual sequences, ensuring your narrative flows seamlessly and every shot serves a purpose. By understanding and implementing effective storyboarding techniques, you lay a robust foundation for a successful and efficiently produced video.
This guide will walk you through the fundamental principles and practical steps involved in creating a simple yet powerful storyboard. We will explore its core components, Artikel a clear process for development, and discuss various tools and methods to bring your vision to life. By the end, you will be equipped to structure your storyboard for maximum clarity and effectively utilize it throughout your production process.
Understanding the Purpose of a Storyboard
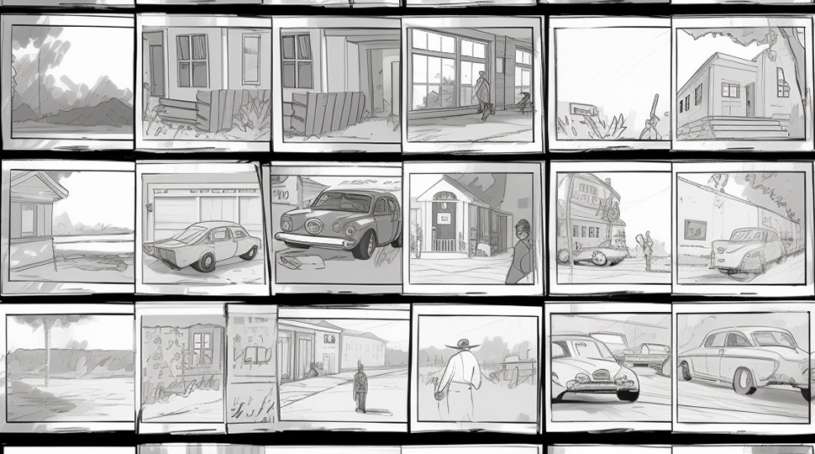
A storyboard is an essential pre-production tool in video creation, acting as a visual blueprint that translates a script into a series of images. It is far more than just a collection of drawings; it is a strategic planning document that guides the entire production process. By providing a clear visual representation of each scene, shot, and action, a storyboard ensures that everyone involved in the project shares a common understanding of the intended outcome.This visual narrative flow is crucial for conceptualizing the rhythm and pacing of your video.
Each panel on a storyboard depicts a specific moment, detailing not only what will be seen but also how it will be framed. This includes elements like camera angles, character placement, movement, and key actions. By meticulously planning these visual components beforehand, you can avoid costly mistakes and save valuable time during filming and post-production.
The Fundamental Role of a Storyboard in Video Production
The primary function of a storyboard is to serve as a visual script, bridging the gap between written words and tangible moving images. It allows creators to anticipate potential challenges and refine their vision before committing resources to actual filming. This proactive approach significantly streamlines the production workflow, making the entire process more efficient and cost-effective.
Visualizing Narrative Flow and Shot Composition
A storyboard meticulously illustrates the progression of your story from one scene to the next, ensuring a coherent and engaging narrative. Each frame is a snapshot of a specific moment, meticulously detailing the visual elements that will convey the story. This includes:
- Shot Angles: Identifying whether a shot will be a close-up, medium shot, long shot, or an extreme close-up to emphasize specific details or convey particular emotions.
- Camera Movement: Indicating planned camera movements such as pans, tilts, zooms, or tracking shots to enhance dynamism and guide the viewer’s eye.
- Character Blocking and Action: Depicting where characters will be positioned within the frame and their actions, ensuring clear storytelling and logical movement.
- Key Visual Elements: Highlighting important props, set designs, or special effects that are critical to the narrative.
Benefits of Using a Storyboard for Pre-Production Planning
The advantages of incorporating storyboarding into your pre-production phase are numerous and impactful. It acts as a critical roadmap, minimizing uncertainties and maximizing efficiency. Some of the key benefits include:
- Clearer Vision: It solidifies the director’s and creative team’s vision, ensuring everyone is aligned on the aesthetic and narrative goals.
- Cost and Time Savings: Identifying potential issues and making adjustments on paper is significantly less expensive and time-consuming than doing so during filming.
- Improved Script Interpretation: It helps to translate abstract script elements into concrete visual representations, leading to a more accurate and impactful final product.
- Enhanced Problem-Solving: Potential logistical or creative challenges can be identified and addressed during the storyboard phase, preventing on-set delays.
Aiding Communication Among Team Members
A well-crafted storyboard is an indispensable tool for fostering effective communication within a production team. It provides a universal language that transcends individual roles and departments, ensuring everyone understands the project’s visual requirements. This shared visual reference point is particularly beneficial for:
- Director and Cinematographer: Clearly communicates the desired shots, angles, and camera movements.
- Art Department: Informs set design, prop selection, and overall visual aesthetic.
- Actors: Helps them understand their positioning, actions, and emotional cues within each scene.
- Editors: Provides a roadmap for assembling the footage in the intended sequence and pace.
- Producers: Offers a clear overview of the project’s scope, helping with budgeting and scheduling.
By presenting a unified visual plan, the storyboard minimizes misunderstandings and ensures that all team members are working towards the same creative objective, ultimately contributing to a more cohesive and successful final video.
Essential Elements of a Simple Storyboard

A storyboard is your visual blueprint for a video, translating your script into a sequence of images. It’s not about artistic perfection, but about clear communication of your story’s flow and key moments. By understanding the fundamental components of each panel, you can ensure your storyboard effectively guides the production process.This section will delve into the core elements that make a storyboard functional and informative, ensuring every team member, from the director to the cinematographer, is on the same page.
Core Components of a Storyboard Panel
Each panel in a simple storyboard should contain a few crucial pieces of information to convey a specific shot or moment. These elements work together to provide a comprehensive snapshot of what will appear on screen.The following are the essential components to include in every storyboard panel:
- Panel Number: A sequential number for easy reference and organization.
- Shot Description/Visual: A sketch or a brief description of the visual content of the shot. This can range from a rough doodle to a more detailed drawing.
- Action Notes: A concise description of what is happening visually within the shot.
- Dialogue/Sound Notes: Any spoken words or important sound effects that accompany the visual.
- Camera Angle/Movement: Indication of the camera’s perspective and any planned movement (e.g., wide shot, close-up, pan, zoom).
Key Information for Each Shot
To ensure clarity and efficiency during production, each shot within your storyboard needs specific details. This information acts as a guide for the crew, minimizing ambiguity and potential misinterpretations.Here’s a list of key information to include for each shot:
- Shot Size: (e.g., Extreme Close-Up, Close-Up, Medium Shot, Wide Shot, Extreme Wide Shot)
- Camera Angle: (e.g., Eye-level, High-angle, Low-angle, Dutch tilt)
- Camera Movement: (e.g., Static, Pan, Tilt, Dolly, Crane, Zoom)
- Subject Focus: What or who is the main focus of the shot?
- Lighting: Brief notes on the desired lighting conditions (e.g., bright, dim, high contrast, silhouette).
- Props/Set Dressing: Any significant objects or elements within the scene.
- Duration Estimate: An approximate length for the shot.
Importance of Visual Descriptions
The visual aspect of a storyboard is paramount. While text provides context, the drawings or images are what truly communicate the intended look and feel of your video. They offer a tangible representation of your creative vision, allowing for early feedback and adjustments.Visual descriptions in a storyboard are crucial because they:
- Translate Ideas into Images: They bridge the gap between abstract concepts and concrete visuals, making them easier to understand.
- Communicate Composition: They show how elements will be framed within the shot, guiding the cinematographer.
- Establish Tone and Mood: The style of the drawings and the depiction of light and shadow can convey the emotional atmosphere of a scene.
- Facilitate Pre-visualization: Directors and crew can “see” the film before shooting, helping to identify potential problems or opportunities.
For instance, a simple sketch indicating a character looking anxiously out a window, with the background blurred, immediately conveys a sense of suspense and isolation, far more effectively than a written description alone.
Necessity of Action and Dialogue Notes
While visuals are key, the accompanying text notes are equally vital for a complete storyboard. These notes provide the essential context and instructions that the drawings alone cannot fully convey.Action and dialogue notes are necessary for several reasons:
- Clarifying Movement: Action notes describe specific character movements, gestures, or events within the shot that might not be evident from a static drawing. For example, “Character A walks across the room and picks up the red book.”
- Recording Spoken Words: Dialogue notes capture the exact lines characters will speak, ensuring accuracy and consistency with the script.
- Indicating Sound: Beyond dialogue, sound notes are crucial for specifying important ambient sounds, sound effects, or music cues that contribute to the overall experience.
- Providing Director’s Intent: These notes often include specific directorial instructions or emotional nuances that the actor and crew need to understand.
Consider a panel depicting a tense negotiation. The visual might show two characters sitting at a table. The action notes could specify, “Character B slams their fist on the table,” while the dialogue notes would contain the exact words spoken during this confrontation. This combination ensures the dramatic impact is realized as intended.
Step-by-Step Process for Creating Your Storyboard
Now that we understand the purpose and essential elements of a storyboard, let’s dive into the practical steps of creating one for your video project. This sequential process will guide you from initial ideas to a visually organized plan, ensuring every shot is considered and contributes to your overall narrative.A well-defined process is crucial for translating your creative vision into a tangible storyboard.
It breaks down the complex task of filmmaking into manageable steps, making the entire production smoother and more efficient. We’ll start with the foundational stages of ideation and script deconstruction.
Brainstorming and Script Breakdown
The genesis of any great video lies in its concept and narrative. Before a single frame is drawn, dedicated time for brainstorming and thoroughly breaking down your script is paramount. This phase ensures that your visual plan is deeply rooted in the story you want to tell.Begin by revisiting your script or core idea. For a written script, read it multiple times to grasp the emotional arc, key plot points, and character actions.
If you’re working from a concept, flesh out the narrative, identifying the essential scenes and transitions. Consider the overall tone and style you aim to achieve.Following this, a detailed script breakdown is essential. This involves dissecting the script scene by scene, and within each scene, shot by shot. For each potential shot, identify:
- The key action or dialogue taking place.
- The emotional state of characters.
- Any important props or set details.
- The desired camera angle and movement.
- The overall mood or atmosphere.
This meticulous analysis forms the bedrock upon which your visual panels will be built.
Translating Script Elements into Visual Panels
With your script thoroughly broken down, the next logical step is to translate these textual elements into visual representations. Each significant moment, action, or piece of dialogue identified in the breakdown will correspond to a panel in your storyboard. The goal here is to provide a clear visual cue for what will happen on screen.Think of each panel as a snapshot of a specific moment in your video.
The content of the panel should directly reflect the script’s requirements for that particular segment. For instance, if your script describes a character looking out a window with a pensive expression, your panel needs to visually convey this.Consider the following for each panel:
- Scene Setting: What is the environment like?
- Character Placement: Where are the characters in the frame?
- Key Action: What are the characters doing?
- Emotional Tone: How can the visual elements suggest the mood?
By systematically converting script cues into visual ideas, you begin to construct the flow of your video.
Sketching Simple Visual Representations
The art of the storyboard lies in its clarity, not its artistic polish. For a simple storyboard, focus on conveying the essential visual information quickly and effectively. Elaborate drawings are unnecessary and can even be time-consuming. The aim is to create clear representations that anyone involved in the production can understand.When sketching your panels, prioritize the composition and action. Use basic shapes and lines to represent characters and objects.
Don’t worry about perfect anatomy or detailed backgrounds; stick figures and simplified environments are perfectly acceptable.Here are some techniques for effective sketching:
- Focus on Composition: How will the shot be framed? Use simple boxes to represent the frame and place your elements within it.
- Indicate Action: Use arrows to show movement, whether it’s a character walking or a camera panning.
- Suggest Emotion: Simple facial expressions (e.g., a curve for a smile, a downturned line for sadness) can convey a lot.
- Highlight Key Elements: If a specific prop is important, make it slightly more detailed or emphasize it in the drawing.
The most effective sketches are those that clearly communicate the intended shot to yourself and others.
Organizing Steps for Adding Descriptive Text and Notes
While visuals are the heart of a storyboard, accompanying text and notes are equally vital for providing context and crucial details. These annotations transform a series of sketches into a comprehensive guide for production. They ensure that technical aspects, dialogue, and specific directorial intentions are not overlooked.Each panel should have associated text that clarifies what is happening and what is needed.
This text acts as a bridge between the visual and the auditory elements of your video.Organize your notes by including the following for each panel:
- Panel Number: For easy reference and ordering.
- Shot Description: A brief, concise summary of the visual content of the panel.
- Dialogue/Sound: Any spoken lines or important sound effects associated with the shot.
- Camera Angle/Movement: Specify if it’s a close-up, wide shot, pan, zoom, etc.
- Action/Notes: Any specific directorial instructions, character motivations, or important actions to capture.
Consider using a table format to keep this information organized and easily accessible alongside your sketches. This structured approach ensures that every aspect of the shot is considered and documented.
Tools and Techniques for Storyboarding
Creating a storyboard is an exciting part of bringing your video idea to life. Fortunately, you don’t need to be a professional artist to do it effectively. A variety of tools and techniques are available, catering to different preferences and skill levels, all aimed at visually communicating your narrative.The method you choose will depend on your comfort level with technology, the complexity of your project, and your budget.
Each approach offers unique advantages for translating your script into a visual sequence.
Methods for Creating Storyboards
There are several popular methods for creating storyboards, each with its own set of benefits. Understanding these options will help you select the best fit for your needs.
- Hand-drawn Storyboards: This is the most traditional and often the quickest method for initial concept development. It requires minimal tools – just paper and a pen or pencil. Hand-drawn storyboards are excellent for brainstorming, allowing for rapid iteration and a tactile feel that can spark creativity. They are also highly accessible, as they require no specialized software or hardware.
- Digital Storyboards: For a more polished and organized approach, digital storyboarding is ideal. This method leverages various software and apps, offering features like layers, templates, and the ability to easily edit and share. Digital storyboards can range from simple document-based layouts to sophisticated graphic design programs.
Free and Accessible Digital Storyboarding Tools
For those looking to go digital without a significant financial investment, numerous free and user-friendly tools are available. These platforms offer a good balance of functionality and ease of use.
- Google Slides/PowerPoint: These presentation software applications can be effectively repurposed for storyboarding. By using a simple slide layout for each panel, you can insert text boxes for descriptions and simple shapes or imported images to represent scenes and characters. Their widespread availability and familiarity make them a convenient starting point.
- Canva: Canva is a popular graphic design platform that offers a wealth of templates, including some that can be adapted for storyboarding. Its drag-and-drop interface and extensive library of free elements make it easy to create visually appealing panels quickly. You can use pre-designed characters, props, and backgrounds, or upload your own assets.
- StoryBoarder (by Wonder Unit): This free desktop application is specifically designed for storyboarding. It offers a range of helpful features such as onion-skinning for animation, brush tools, and the ability to export your storyboard in various formats. It’s a robust option for those who want a dedicated tool without a cost.
- Milanote: Milanote is a visual workspace that allows you to organize ideas and projects using a flexible drag-and-drop interface. You can create notes, upload images, and arrange them on a board, making it suitable for building out a visual storyboard. It offers a generous free plan for individual use.
Using Basic Shapes and Lines to Convey Action and Emotion
You don’t need intricate drawings to communicate effectively in a storyboard. Simple geometric shapes and lines are powerful tools for conveying movement, direction, and even emotional states.
- Action: Arrows are your best friend for indicating movement. A simple arrow can show the direction a character is walking, an object is falling, or a camera is panning. Varying the thickness or style of the arrow can suggest speed or force. Curved lines can represent fluid motion, while jagged lines might imply erratic movement or impact. For example, a character moving from left to right across the frame can be indicated by a straight arrow pointing right.
A quick jump might be shown with a curved arrow showing an upward and then downward trajectory.
- Emotion: While facial expressions are key, even simple shapes can hint at emotions. A character’s posture can be conveyed through the angle of their body shape. For instance, slumped shoulders (indicated by downward-sloping lines from the head) can suggest sadness or fatigue, while an upright, expansive posture (upward-pointing lines) might imply confidence or excitement. The overall composition of shapes within a panel can also contribute to the mood; sharp, angular shapes might create a sense of tension, while soft, rounded shapes can feel more calming.
The Use of Simple Stick Figures and Basic Icons for Character Representation
When focusing on the narrative and action, detailed character designs are often unnecessary in a storyboard. Simple representations allow the viewer to focus on what the character is doing and how they are interacting with the environment.
- Stick Figures: These are the epitome of simplicity. A circle for a head, a line for a torso, and lines for limbs are sufficient to depict a character’s presence and basic pose. You can add simple variations to convey emotion or action: bent knees for running, outstretched arms for reaching, or a tilted head for curiosity. For example, a stick figure with its arms raised and a smile (even a simple curved line) can represent happiness or celebration.
- Basic Icons: Beyond stick figures, simple icons can represent specific roles or actions. A silhouette can be used for a generic crowd or a figure whose identity isn’t important. A simple star icon could represent a celebrity, or a gear icon might signify a technical process. These abstract representations help keep the focus on the story’s progression rather than on intricate visual details.
For instance, if your story involves a chef, a simple icon of a chef’s hat above a stick figure can instantly communicate their role.
Structuring Your Storyboard for Clarity
A well-structured storyboard is the backbone of effective video production, ensuring that everyone involved understands the visual narrative and technical execution. By paying attention to key organizational elements, you can transform a series of sketches into a clear roadmap for your video. This section delves into the essential aspects of structuring your storyboard to maximize clarity and minimize confusion.A consistent visual style across all panels is crucial for maintaining the intended mood and aesthetic of your video.
This consistency helps viewers (and your production team) to quickly grasp the overall look and feel. Think about the general artistic approach you want to take – will it be realistic, stylized, cartoonish, or something else? This decision should inform the way you draw your characters, backgrounds, and props in every frame. Uniformity in line weight, color palette (if applicable), and character design ensures that the storyboard feels cohesive, much like watching a preview of the final product.Clear panel numbering and sequencing are fundamental for logical flow.
Each panel should be distinctly numbered in the order it appears in the video. This numbering acts as a reference point, allowing for easy discussion and revision. Imagine trying to explain a scene without a clear sequence – it would be chaotic. Numbering each frame sequentially, often with a decimal system for slight variations or sub-scenes (e.g., 1.1, 1.2), provides an unambiguous guide for the entire production team, from editors to animators.Indicating camera angles and movement is vital for translating your vision into actual shots.
Without this information, the best visual ideas can be misinterpreted. You need to communicate how the viewer will see the action. This includes specifying whether a shot is a wide shot, medium shot, close-up, or extreme close-up, as well as detailing any camera movements like pans, tilts, zooms, or dollies.Representing sound effects and music cues ensures that the auditory experience is considered alongside the visual.
Sound plays a critical role in storytelling, and its integration should be planned from the storyboard stage. Noting specific sound effects (e.g., “door creaks,” “car horn”) or music cues (e.g., “upbeat instrumental,” “dramatic sting”) helps the sound designer and composer understand the intended atmosphere and pacing.Here is a sample storyboard layout that incorporates these elements using a table structure, designed for optimal clarity:
| Panel Number | Visual Description | Dialogue/Action Notes | Camera Shot |
|---|---|---|---|
| 1 | A lone figure stands silhouetted against a vibrant sunset, looking out over a vast, empty desert landscape. The sand dunes stretch endlessly. | (No dialogue) Character takes a deep breath. A sense of longing. | Wide Shot (WS)
|
| 2 | Close-up on the figure’s weathered hands, which clench into a fist. A single tear rolls down their cheek. | (Internal monologue, whispered) “It’s time.” | Close-Up (CU)
|
| 3 | The figure turns, revealing a determined expression. They begin to walk towards the horizon. | (No dialogue) Character begins walking with purpose. | Medium Shot (MS)showing character and action. Slight camera push-in. |
| 4 | A wide shot of the desert again, but this time the figure is a small speck moving resolutely towards the distant mountains. | (Sound: Wind blowing softly, distant hawk cry) | Extreme Wide Shot (EWS)
|
| 5 | A quick cut to a dusty, old map spread out on the sand. A finger traces a line across it. | (Sound: Rustling of paper) | Over-the-Shoulder (OTS) shot of the map, then a close-up of the finger. |
Visualizing Key Scenes and Transitions

A storyboard is fundamentally a visual blueprint, and its true power lies in its ability to translate narrative into images. This section delves into how to effectively use your storyboard panels to communicate the most critical moments of your story and how the action flows from one scene to the next, ensuring your vision is clear to everyone involved.Depicting important plot points visually is the cornerstone of a compelling storyboard.
These are the moments that drive the narrative forward, reveal character motivations, or introduce crucial conflicts. Your storyboard panels for these scenes should be carefully composed to highlight the action and emotional weight of the event.
Illustrating Scene Changes and Transitions
Effectively showing how one scene gives way to another is vital for pacing and narrative flow. Transitions can be as simple as a cut from one shot to the next or more complex, involving fades, dissolves, or wipes. Your storyboard should visually represent these shifts to guide the editing process.Here are common ways to illustrate scene changes and transitions in your storyboard:
- Cutting: Represented by placing two distinct panels side-by-side. The end of one panel visually leads into the beginning of the next, implying an immediate shift.
- Fades: To indicate a fade-out, you might show the current panel gradually becoming darker or more opaque, and for a fade-in, the next panel would start dark and gradually become clearer. This can be described in notes or by drawing subtle variations in shading.
- Dissolves: This transition, where one scene blends into another, can be depicted by showing a ghosted image of the next scene superimposed over the current one, with increasing opacity for the new scene.
- Wipes: A wipe can be shown by drawing a line or shape moving across the current panel, revealing the next scene behind it. The direction and speed of the wipe can be indicated with arrows or notes.
- Match Cuts: These are transitions where two shots are linked by a similar visual element or action. Your storyboard panels would highlight this shared element, making the connection obvious. For example, a shot of a spinning record could dissolve into a shot of a spinning planet.
Showing Character Expressions and Emotional States
The emotional journey of your characters is often conveyed through their expressions and body language. Your storyboard panels should capture these nuances to ensure the actors and director understand the intended performance.Techniques for showing character expressions and emotional states include:
- Facial Expressions: Draw close-ups of faces to emphasize key emotions like joy, sadness, anger, surprise, or fear. Exaggerate features slightly if necessary to make the emotion clear. For instance, wide eyes and an open mouth clearly convey surprise, while furrowed brows and a downturned mouth indicate sadness or anger.
- Body Language: Use posture, gestures, and positioning to communicate feelings. A slumped posture might suggest defeat, while an upright, confident stance conveys determination. A character wringing their hands could indicate nervousness.
- Dialogue Bubbles (Optional): While not strictly visual, adding brief dialogue snippets or emotional cues within or near the panel can reinforce the intended feeling. For example, a small note like “(nervously)” or “(whispering)” can be highly effective.
- Color and Lighting Cues: Although the storyboard itself might be in black and white, you can use notes to suggest the color palette or lighting that will enhance the emotional tone of a scene. For example, a note might say “warm, golden light for happiness” or “harsh, blue lighting for fear.”
Representing the Overall Mood and Atmosphere of a Scene
Beyond individual character emotions, the overall mood and atmosphere of a scene are crucial for immersing the audience. Your storyboard should offer clues about the intended feeling of the environment and the situation.Here’s how to represent the overall mood and atmosphere:
- Composition: The arrangement of elements within the frame can greatly influence mood. Wide shots with vast, empty spaces can evoke loneliness or awe, while tightly framed, cluttered scenes might suggest tension or claustrophobia.
- Lighting and Shadow: Even in a simple sketch, you can suggest lighting by using shading. Heavy shadows can create a sense of mystery, dread, or drama, while bright, even lighting might suggest normalcy or happiness.
- Camera Angles: Low-angle shots can make a subject appear powerful or imposing, while high-angle shots can make them seem vulnerable or insignificant. A Dutch angle (tilted camera) can convey disorientation or unease.
- Color Palette Suggestions: As mentioned before, notes can be used to suggest dominant colors. Cool colors like blues and greens often evoke calmness or sadness, while warm colors like reds and yellows can suggest energy, passion, or danger.
- Environmental Details: The inclusion of specific details in the background can contribute to the atmosphere. A stormy sky, a messy room, or a pristine garden all carry their own connotations and contribute to the overall mood.
Refining and Using Your Storyboard

Once you’ve laid out the visual foundation of your video, the next crucial step is to refine and actively utilize your storyboard. This iterative process ensures your vision translates effectively from paper to screen and serves as an indispensable tool throughout your production journey.This section focuses on making your storyboard a living, breathing document that guides your team and adapts to the realities of filmmaking.
It’s about transforming static drawings into dynamic blueprints for success.
Storyboard Review and Revision
A thorough review and revision process is paramount to guarantee your storyboard accurately reflects your intended narrative and technical requirements. This stage catches potential issues before they become costly problems during filming.
- Accuracy Check: Ensure each panel clearly depicts the intended action, shot composition, and camera angle. Verify that dialogue or voiceover notes align with the visuals.
- Completeness Assessment: Confirm that all key scenes, transitions, and essential visual cues are represented. No significant moments should be overlooked.
- Flow and Pacing Evaluation: Read through the storyboard sequentially to assess the rhythm and pacing of the video. Does it feel too fast, too slow, or just right?
- Technical Feasibility: Consider if the depicted shots and movements are practically achievable within your budget, timeline, and available equipment.
- Consistency Verification: Check for consistency in character appearance, set design, and overall visual style across all panels.
Collaborator Storyboard Sharing Best Practices
Effective communication is key when working with a team. Sharing your storyboard in a clear and accessible manner ensures everyone is on the same page and understands the project’s direction.Before distributing your storyboard, consider the following:
- Centralized Access: Utilize a shared drive, cloud storage, or project management tool where all collaborators can easily access the latest version of the storyboard.
- Clear Annotation: Add detailed notes to each panel, including camera instructions, character actions, sound cues, and any specific directorial intent.
- Version Control: Clearly label each version of the storyboard to avoid confusion. Implement a system for tracking changes and updates.
- Team Walkthrough: Schedule a meeting to walk through the storyboard with your team, allowing for questions and feedback. This fosters a shared understanding and buy-in.
- Designated Feedback Channel: Establish a clear method for collaborators to provide feedback, such as a comment section within the digital document or a dedicated email thread.
Storyboard Utilization During Filming
Your storyboard is not just a pre-production document; it’s your primary guide on set. It translates your creative vision into actionable instructions for the cast and crew.During filming, the storyboard serves as:
- A Visual Script: It provides a clear shot list and sequence, helping the director and cinematographer frame each shot precisely as intended.
- A Communication Tool: It allows for quick and efficient communication of complex ideas to the camera operator, actors, and other crew members.
- A Pacing and Timing Reference: It helps maintain the intended rhythm and duration of scenes, ensuring the overall flow of the video remains intact.
- A Problem-Solving Aid: When unexpected challenges arise, the storyboard can be a starting point for finding creative solutions that maintain the integrity of the original vision.
For instance, if a planned shot proves difficult to execute due to lighting or location constraints, referring back to the storyboard can help the team brainstorm alternative angles or compositions that achieve a similar visual impact.
Making Minor Storyboard Adjustments During Production
While the storyboard is a robust plan, filmmaking is an organic process. Be prepared to make minor adjustments as production progresses to accommodate unforeseen circumstances or creative discoveries.The key is to manage these changes effectively:
- Document All Changes: Any deviation from the original storyboard must be recorded. This ensures transparency and prevents confusion later on.
- Communicate Updates Promptly: Inform all relevant team members about any storyboard revisions immediately.
- Assess Impact: Before making a change, consider its ripple effect on other shots, scenes, or the overall narrative.
- Prioritize the Vision: While flexibility is important, ensure that any adjustments still serve the core story and intended message of the video.
For example, if an actor naturally delivers a line with a slightly different emphasis, a minor adjustment might be made to the accompanying visual action in the storyboard to better complement that performance, without altering the fundamental meaning of the scene.
Final Wrap-Up

In essence, mastering the art of storyboarding is a pivotal step in elevating your video production from concept to compelling reality. By diligently following the Artikeld steps, you can translate your script into a clear visual blueprint, fostering better communication, streamlining the filming process, and ultimately achieving a more cohesive and impactful final product. Embrace this powerful tool, and watch your creative visions unfold with precision and purpose.